The [Sitecore For Newbies] series is back! Bringing to you 5 ways to customize your Sitecore instance.
❓ Why should you do it?
To improve your daily work and avoid confusion when switching between environments.
💡 For example, when you’re working with two different environments, like Dev and Prod, it’s a good idea to have something to identify them and avoid any confusion. You don’t want to change an item in Prod thinking you’re in Dev, right? So with a simple change of background, we can differentiate the environments. In addition, adding some shortcuts to your Content Editor Ribbon will speed up your daily tasks.
✅ You’re going to learn:
- How to change the Desktop Background.
- How to change the Login Background.
- How to add shortcuts to the Desktop.
- How to change the Start Page.
- How to Enhance the Content Editor Ribbon.
1) Desktop Background
There are two ways to change the Desktop background:
- Go to Control Panel > My Settings > Change Desktop background
- Go to Desktop > Right-Click anywhere > Properties


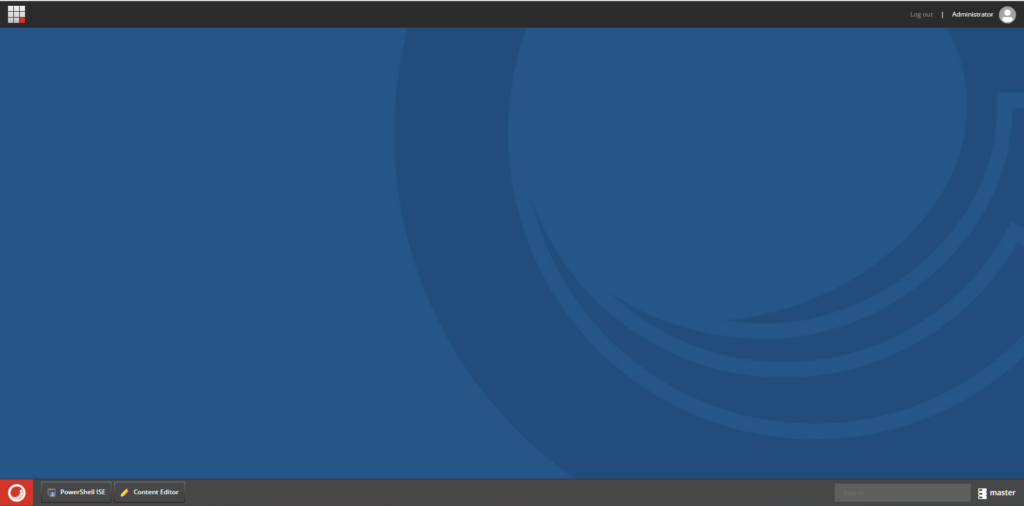
We can either choose one of the ootb background, or use a solid color. or use a custom background. To add a custom background go to “<webroot>/sitecore/shell/Themes/Backgrounds“.


Also, there’s a option to change the Position to Center, Tile, Stretch, and Cover.

The result:
2) Login Background
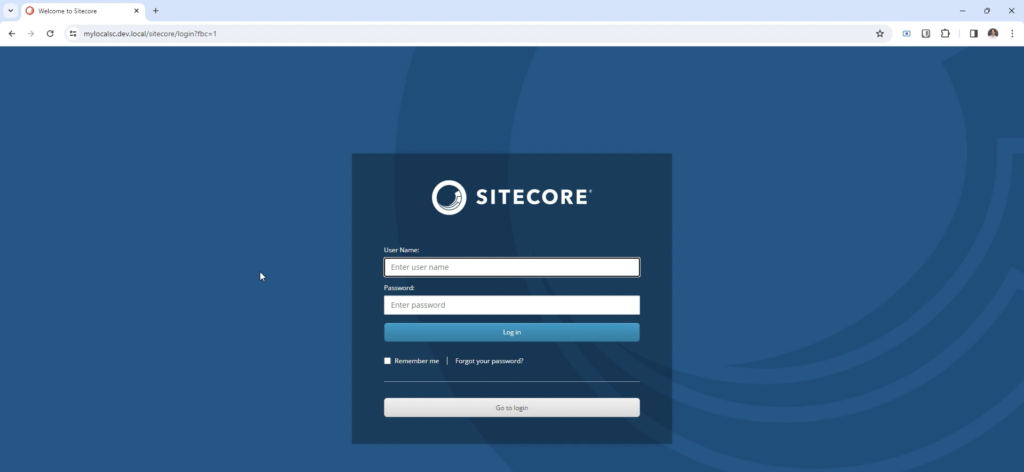
Another customization that I think it’s interesting is changing the Login Background. It streamlines the identification of environments in case you’re working in multiple ones. For instance, it’s possible to add a green background to your local, a yellow one for Stage/QA, and a red one for Production. Thus, we avoid mistakes working back and forth in these environments.
To change the Login background we need to patch a new config file:
<configuration xmlns:patch="http://www.sitecore.net/xmlconfig/">
  <sitecore>
    <settings>
      <setting name="Login.BackgroundImageUrl">
        <patch:delete />
      </setting>
      <setting name="Login.BackgroundImageUrl" value="/sitecore/login/Blue.jpg" />
    </settings>
  </sitecore>
</configuration>
Add it to the “AppConfig/Include/” folder and change the value of the “Login.BackgroundImageUrl” setting.
3) Desktop Shortcuts
Desktop Shortcuts are the way to go to save your time. Add shortcuts to point to the most used items of your content tree.
- Go to Desktop Mode > Right-click anywhere > Create Shortcut
- Browse the Item.
- Add a name.
- Add an icon.


Double-clicking on the shortcut redirects you to the item on the Content Tree. Right-click on the shortcuts allows you to edit or remove it.
4) Start Page
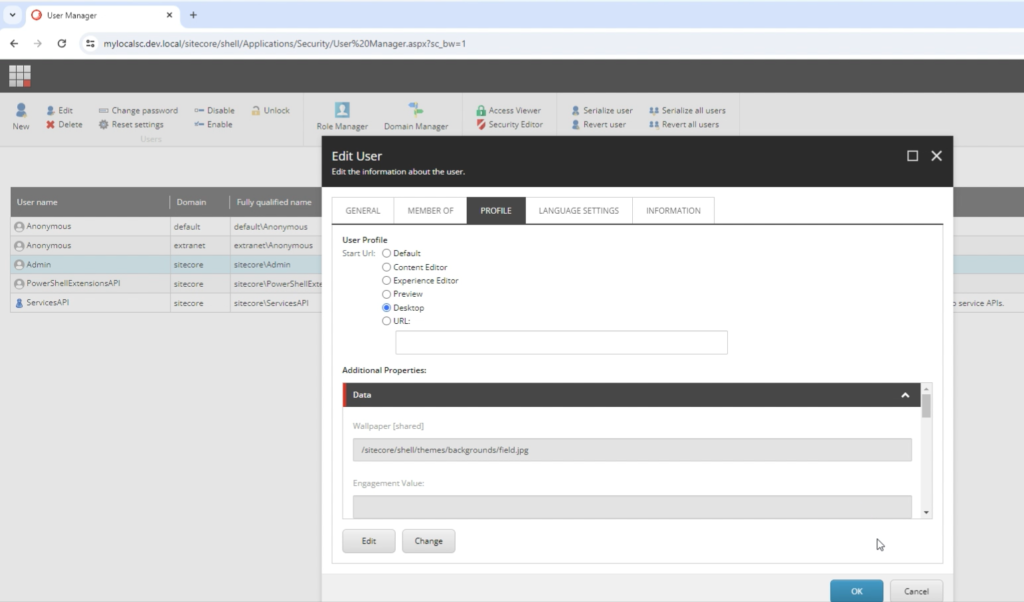
Would you like to see the Content Tree or the Desktop Mode instead of the Launchpad after logging in to Sitecore? This is possible, just follow these steps:
- Go to User Manager
- Choose the desired User.
- Click on Edit on the ribbon.
- Go to Profile
- Change the Start Url
5) Content Editor Ribbon
Usually, the Content Tree starts with 11 tabs, but do you use all of them daily? If your answer isn’t 100% yes, I think you should consider disabling some of them. Thus, you can have a cleaner environment, focus on what matters, and save time.
Right-click on the ribbon and uncheck any unused tab.
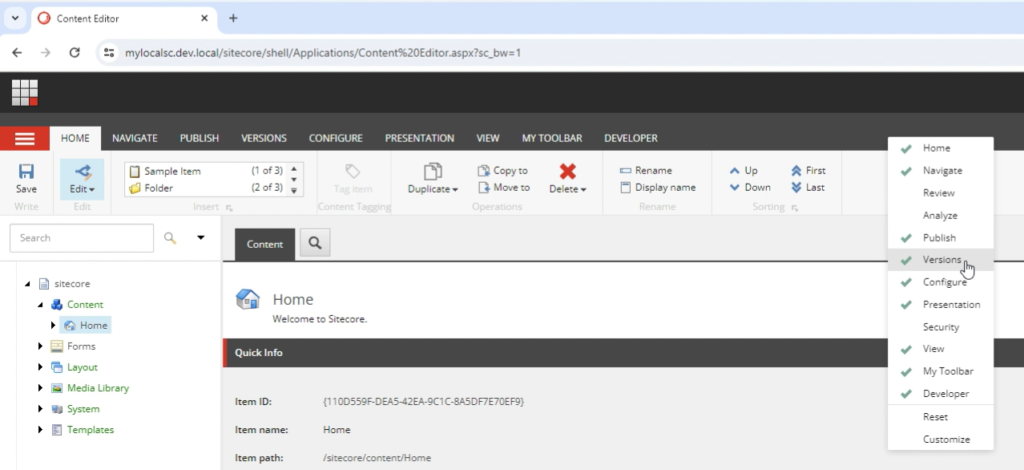
Also, we can easily add shortcuts to the My Toolbar tab:
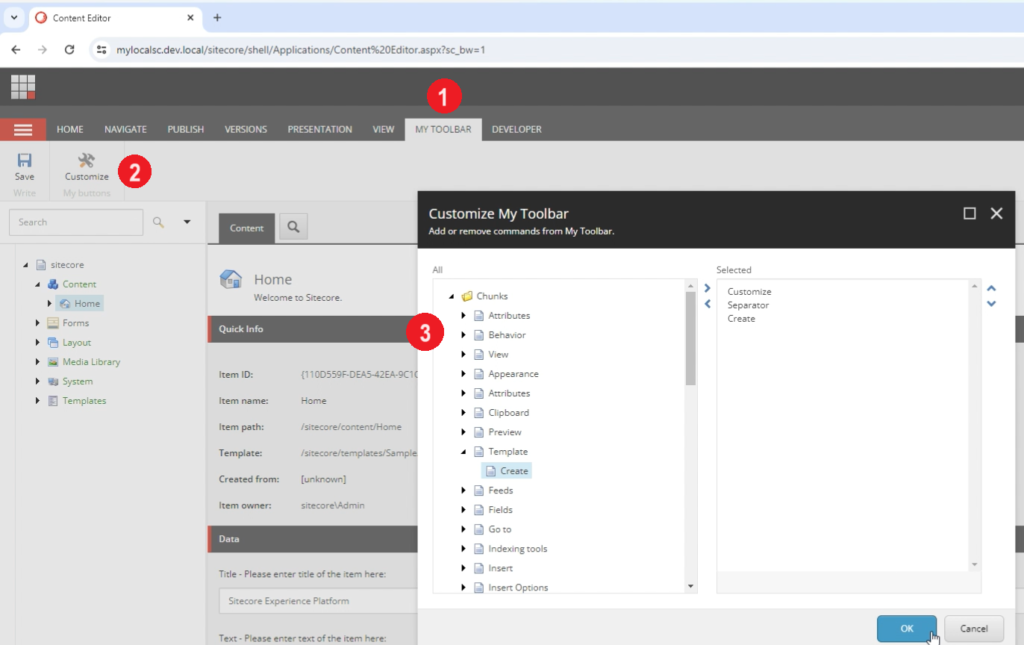
Are you still confused about any steps? Take a look at my video where I walk you through all these tips:
That’s all folks,
👉 Thank you and stay tuned for more insights and tips in the [Sitecore For Newbies] series.
Leave a Reply